YEAR 9 - 10 'BODY' ANNOTATED CREATIVE PROCESS AND LEARNING SEQUENCE.
Mind Map.
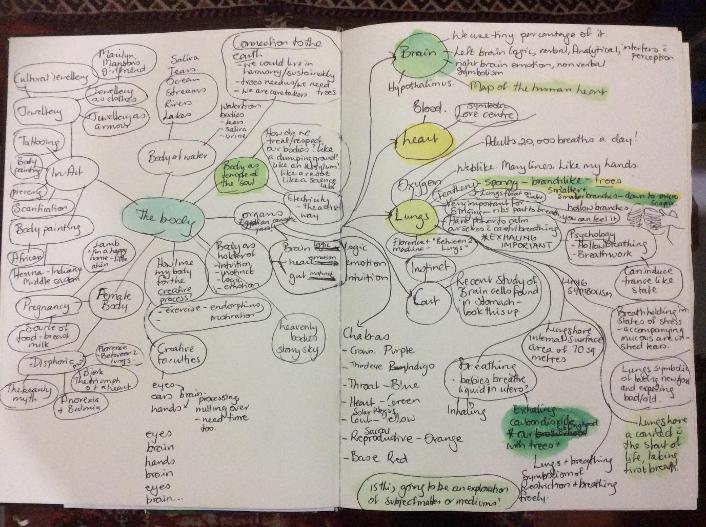
The theme of our project was ‘The Body’. I began with a mind map. It was added to from time to time during the creative process. I endeavoured to write down everything I could think of related to the body, aiming to make order of my thoughts as I went. I noticed that during this first step, my enthusiasm for the project was growing. The highlighted parts of the diagram are to indicate where this project’s themes went. I was invested in everything I wrote down and could engage with this same project over and over, each one achieving a completely different result.
Collecting Images.
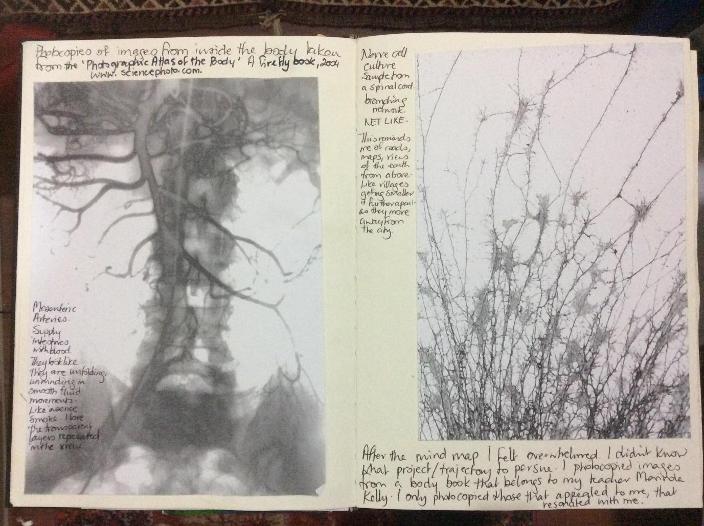
Because I had so many potential trajectories, I thought it best to look through one of my teacher’s resource books called ‘Photographic Atlas of the Body’. I photocopied pictures that resonated strongly with me without questioning why I was choosing them. I glued these images into my visual diary and took note of the thought processes and responses I was having to each. Interestingly, the photos I collected all had a ‘network’ theme to their appearance.
Heart.
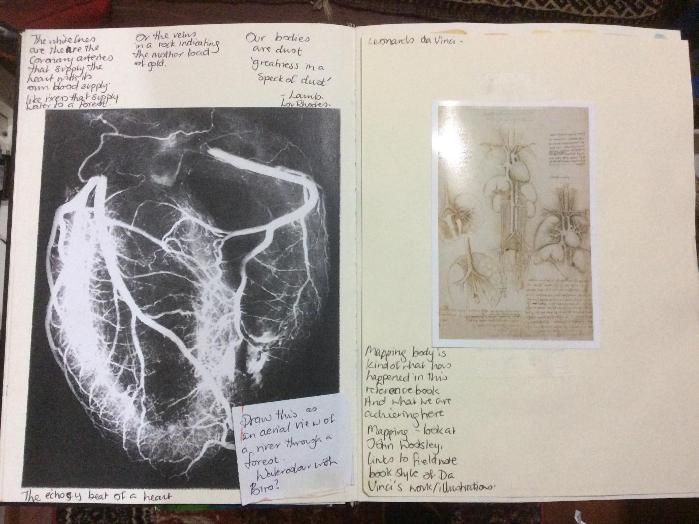
The heart image I acquired immediately brought to mind river deltas viewed from above. I then remembered the term ‘Map of the human heart’ and also the work of John Wolseley.
MAKING: Consider all the different mediums Wolseley uses in one art work and incorporate some or all of these into an experiment. Visual Arts practice. Explore and Express Ideas. (VCAVAE041)
RESPONDING: watch this video about John Wolseley.
https://www.ngv.vic.gov.au/exhibition/john-wolseley/
Consider how he presents his artwork to the audience and why. Respond and Interpret (VCAVAR045)
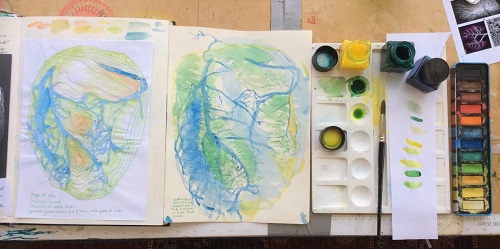
I played with two images that were derived from this photocopy, a ‘topographical map’ and an aerial view of the heart from the perspective of it being a land mass. While I was pleased with these two images, I intuited there was something more.
Kidney.
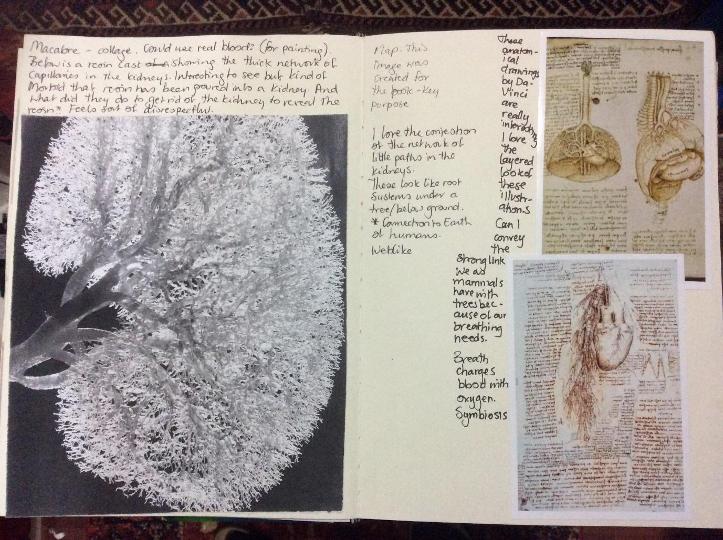
The next image was a kidney, I was drawn to the tiny vein like structures that were within it. When I read the annotation in the resource book that the kidney had been filled with resin to illustrate how concentrated the network of vessels inside the kidney were, my response was that it was macabre.
Around this time I began thinking about the lineage of artists that had gone before me. Da Vinci had a strong engagement with the human body and had closely examined the inner workings of the human form. I find his illustrations fascinating and visually beautiful to look at. The layering of organs he implies in his drawings are compelling. I contemplated how I might convey layers of body parts as Da Vinci had.
Lungs 1.
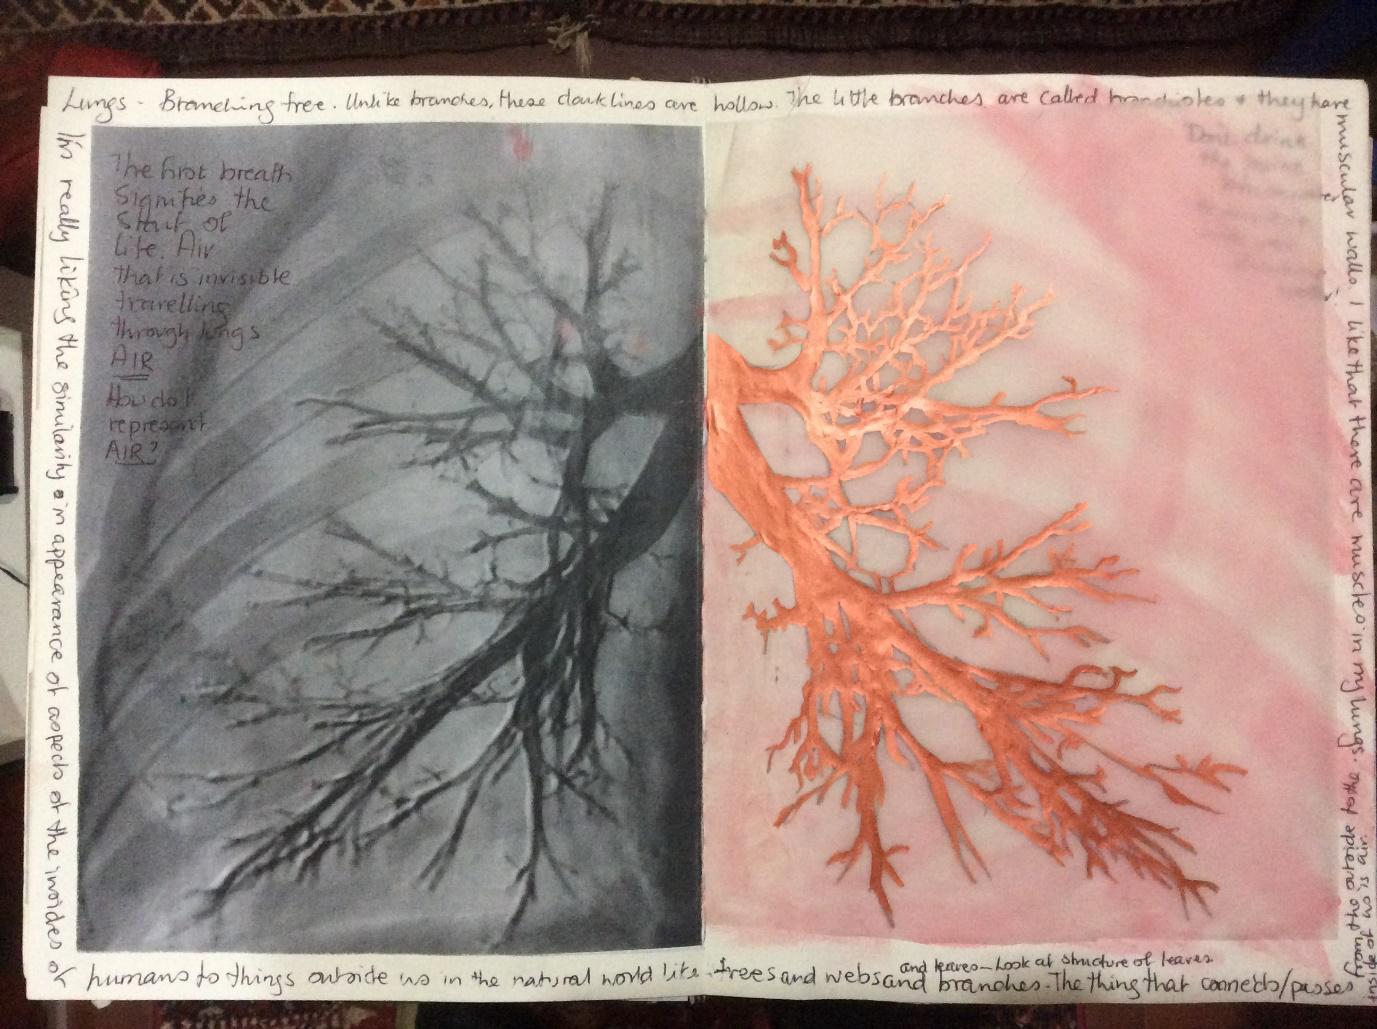
I had undertaken a brief Google search of lungs and lung symbolism. One response I could relate to was that lungs signify the commencement of life when the first breath of air is inhaled. Some religions consider the life energy goes in with the first breath. I also delight in the notion that humans and trees are siblings of a sort, we live symbiotically – we need each other.
I experimented with the Da Vinci inspired layering. I traced the branchlike lines onto the back of some vintage velum (tracing paper), then painted inside the lines with copper paint on the top side. Metallic paints draw attention to an artwork as the audience’s gaze is held by the three dimensional appearance of the copper paint. Gloss varnish could have a similar but more subtle effect.
Lungs 2.
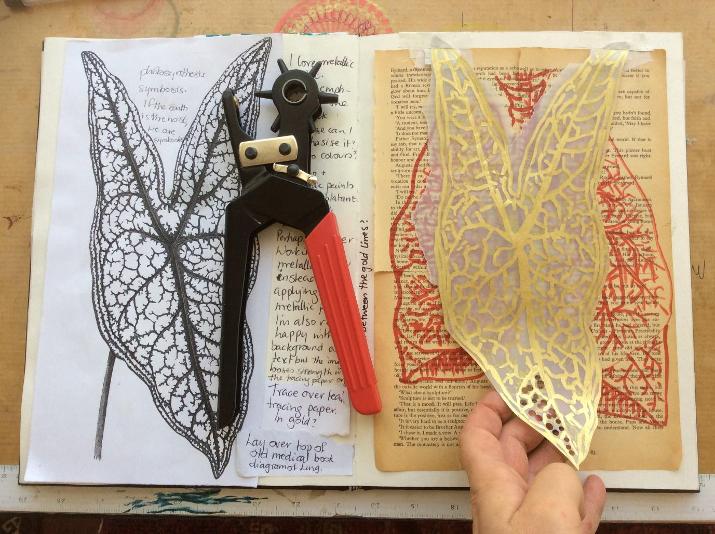
While I was happy with the results of the copper lungs, I wanted to see how far I could extend my thought process related to lungs.
The realisation that animals with lungs live in symbiosis with trees and plants directed me to emphasise the connection we have with trees. I found a leaf photograph that had deep veins decorating its surface. Implementing the Da Vinci – esque idea of layering, I traced the leaf onto tracing paper with gold pen. Old anatomy books have soft ochre coloured pages and tiny writing which I wanted to replicate. I thought an interesting effect may result from using collage techniques. I pieced four pages together and hand drew lungs onto the page. The gold leaf was overlayed but the image lacked punch, the deep red lungs was quite subdued. I experimented with hole punching into the tracing paper to expose more of the red lungs image in the lower layer. It was an interesting result but I was driven to try something new.
Collage – Internal Organs with Plant Parts.
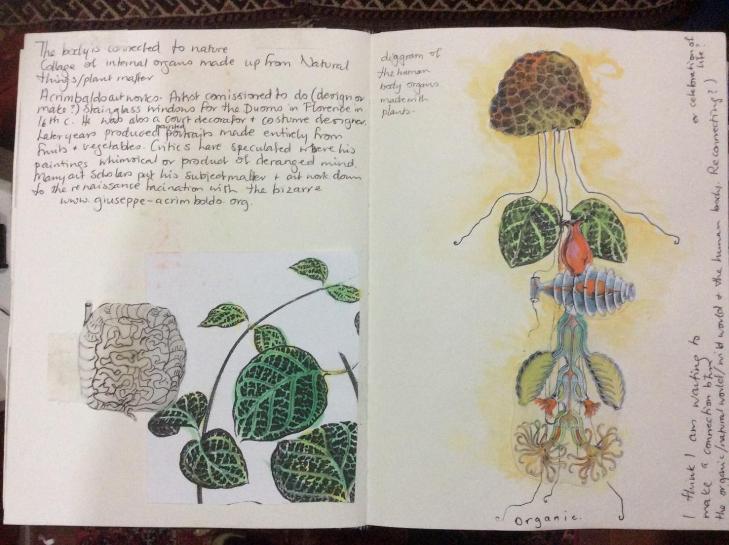
From the idea of the plant leaf that I associated with lungs, I was motivated to represent our internal organs with plant images, representing our connection with nature. I looked into the work of Giuseppe Arcimboldi who produced whimsical portraits made up entirely from fruits and vegetables during the renaissance (16th century).
MAKING: Scroll down to the heading ‘Try this’ and engage with the activity.
Explore and Express Ideas. (VCAVAE040)
RESPONDING: Scroll down to the heading ‘Where Art meets Science’. Read the article and consider the questions at the end. Respond and Interpret. (VCAVAR046)
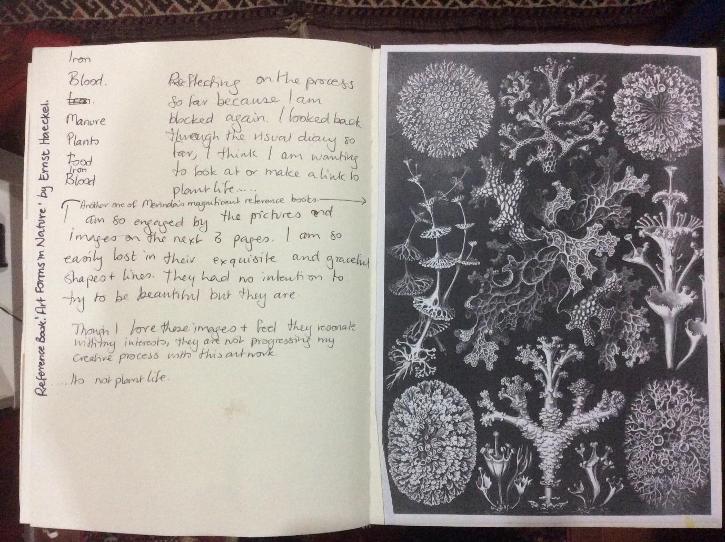
The reference I used for images was an amazing book called ‘Art Forms in Nature’ by Ernst Haeckel. This book I found extremely engaging which reveals a little more of my innate interest and artistic style. I collected two more pages of images from this book but in the end they were a dead end in my creative process of making. Perhaps this was because they were already resolved pieces of art work in my opinion. They did influence me in some way he delicacy of image I developed to resolve this creative process.

Crayon Rubbings.
I reviewed the thought process and images that I had acquired and created so far. I observed that networks had engaged me, and was a consistent thread throughout the work. The net like aspect to the human body images of blood supply arteries, nerve cell cultures, coronary arteries, kidney capillaries and bronchioles of the lungs we also consistent influences. I have been drawn to the notion of breathing and breath as signifier of life starting and our connection to nature, trees specifically.
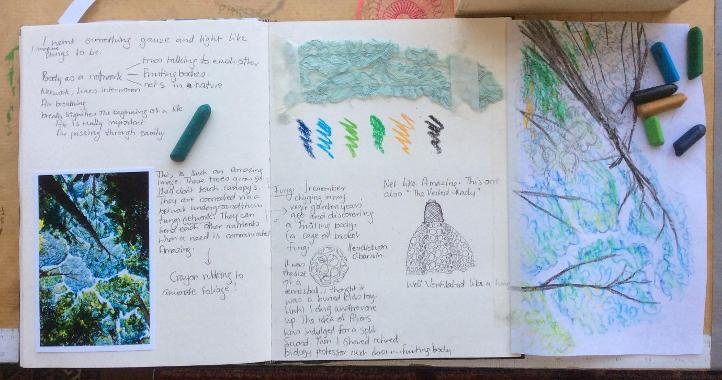
My creative process then engaged with the phenomena of trees where that ‘talk’ to each other through fungi networks underground. They can communicate needs and send each other nutrients. For more information, see:
https://e360.yale.edu/features/exploring_how_and_why_trees_talk_to_each_other
MAKING: consider ways you might convey in art the phenomena of trees communicating with each other. Present and perform. (VCAVAV042)
RESPONDING: Read the first three paragraphs of the above article. Why is this an important issue for us today? When did environmental art start? How can we support the environment with our practice (use of materials and artwork production). Visual Arts practice. (VCAVAV043)
I experimented with crayon rubbings over lace. I liked the symbolic connection as the lace is held together by a net. The trajectory has a lovely resonance with my personal interests and with artmaking but this area of inquiry will have to be explored further at a later stage as I intuit it is not where I am meant to go with this theme.
I recalled I once dug up this organic object in my garden that looked completely unnatural. Its appearance was the shape and size of a tennis ball and looked like a white plastic cage. After enquiring with a neighbour who was a retired biology professor, I learnt that it was a fruiting body, a type of fungus. They spread their spores by surfacing, unfolding and rolling along the ground. When I searched the internet for other images of fruiting bodies, I discovered ‘the Veiled Lady’, a type of fungus that has a ‘skirt’ of sorts that looks like a spider’s web.
Spider Webs and Artist, Cija Celmins.
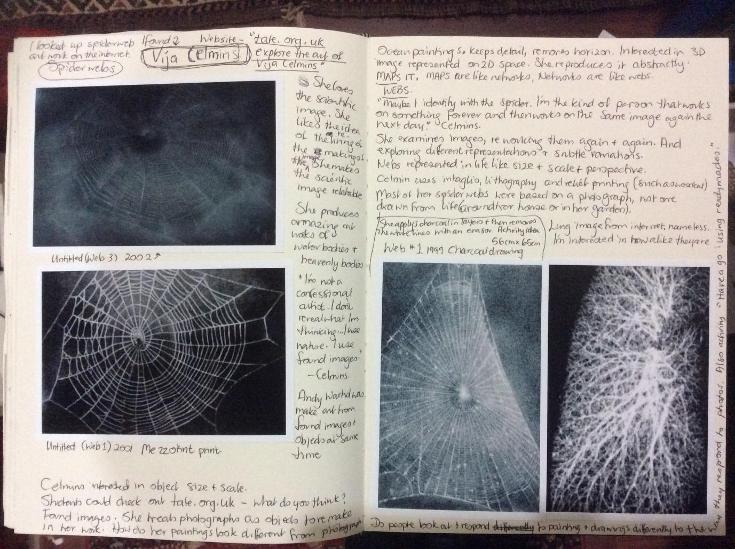
I researched artworks that used spiders’ webs as a motif and discovered the artist Cija Celmins. She is interested in the physical world, and, as she puts it, ‘Not a confessional artist. I don’t render what I’m thinking. I use nature. I use found images’ (Tate, 2019).
Celmins draws, paints and uses various printing methods to produce her artwork.
MAKE: https://www.tate.org.uk/art/artists/vija-celmins-2731/explore-art-vija-celmins
Scroll down to “Image and Scale” heading. This section includes an activity prompting you to make a relief print. Visual Arts Practice. (VCAVAV042)
RESPOND: https://www.tate.org.uk/art/artists/vija-celmins-2731/explore-art-vija-celmins Click the link above and work through the ‘What do you think’ questions. Explore and Express ideas. (VCAVAE040)
Collecting Images of Spider Webs.
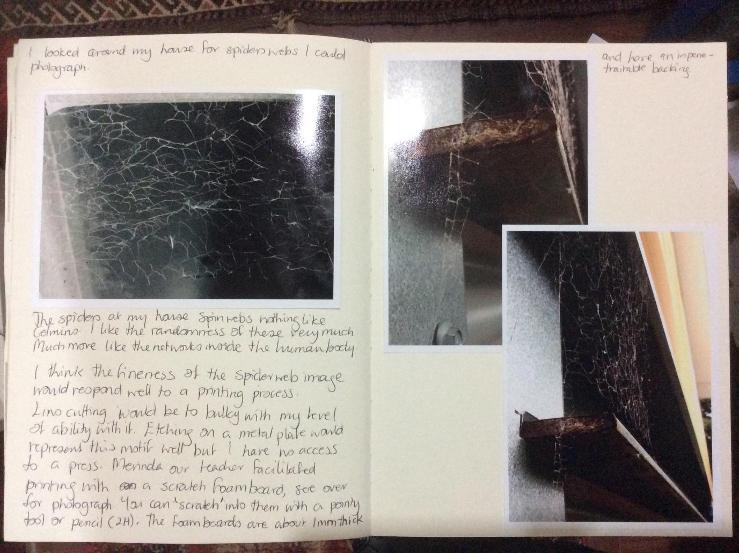
Unlike Celmins, I looked around my home and garden for spider webs to photograph and experiment with.
The fine detail in spider webs would respond well to a printing process. Our teacher demonstrated the process of printing with a scratch foam board. It is a thin, board with 1mm of polystyrene foam on top of it. You simply scratch an image into the foam with a pointy tool or sharp pencil and it is ready to print. This was a perfect medium to use as I had no easy access to a printing press.
Photograph, Worked Image and Scratch Foam Board.

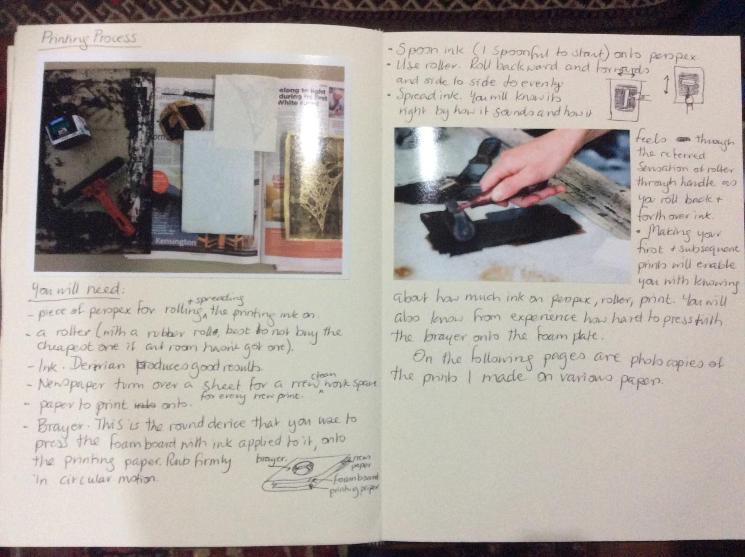
Printing Process.
Below are the details of the printing process:
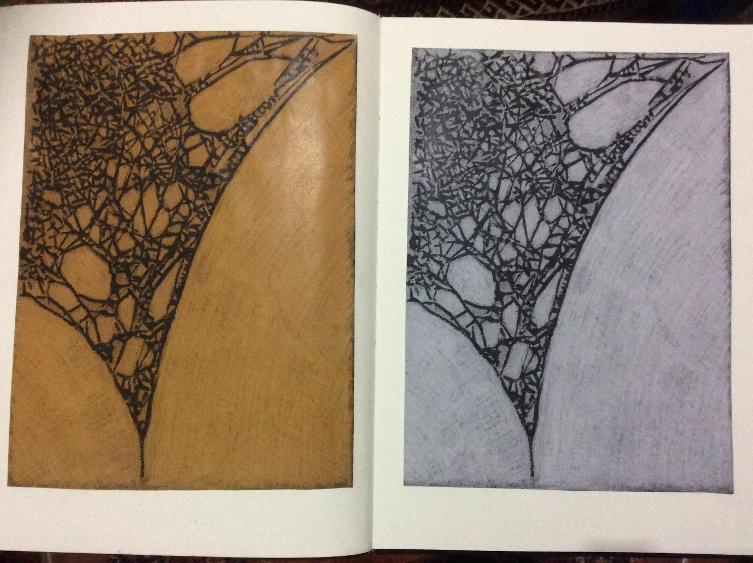
Finished Prints.
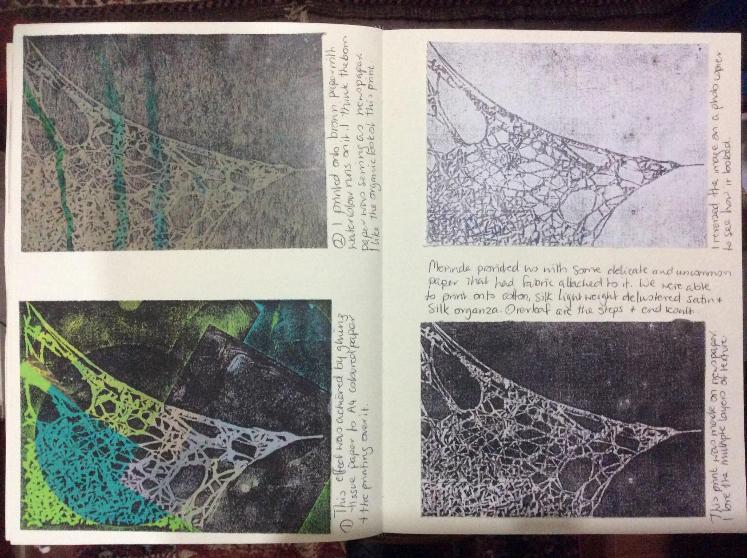
Printing on Silk with the Use of a Photocopier.
Our teacher informed me that it is possible to print onto fabrics, cotton, silk satin and silk organza (which is translucent). After some consideration of how I wanted the final image to look, I prepared the image to be used. This required me to completely black out the background, removing all texture and grain as I wanted a reverse of the original print, white background and black spider web. Filling the background in by hand with black was not a dense enough coverage so I cut away the background and attached my image to some white paper ready for photocopying onto the fabrics. I was very happy with the result.

Developing the Image into a Resolved Artwork.
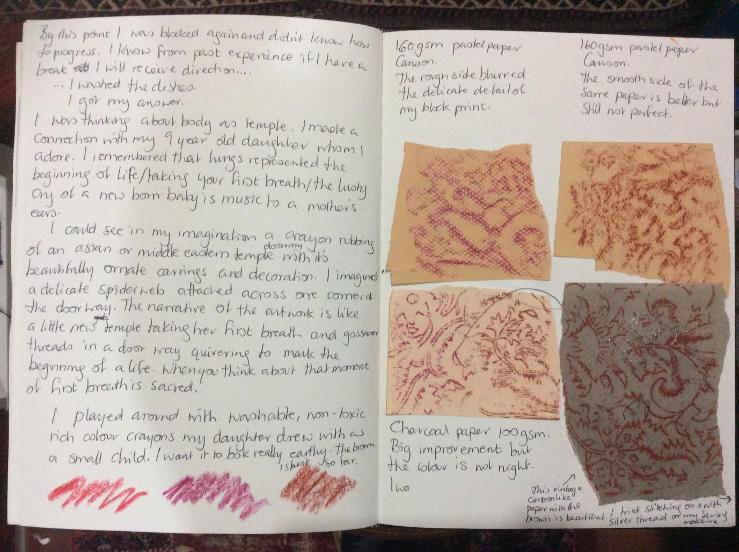
I was not sure how I wanted to the resolve the artwork and was feeling blocked again. I knew from past experience that if I move away from the creative process and do something menial like washing dishes, my busy mind has time to rest and clear, and this is when I get an idea I can proceed with. I recalled the importance to a mother of hearing a baby’s first lusty cry, as it signifies the baby is alive and alright. Babies have to take their first breath to be able to cry.
I reflected on some of the experiments I had undertaken, particularly the crayon rubbing method used when I explored the network of trees concept. I recalled the notion of ‘body as a temple’ or dwelling, of a person’s soul, first mentioned in the mind map.
Using an ornately carved, Indian block print I own, I experimented with different papers and crayon colours. I found that the lower the paper gsm (paper thickness,) the better the result. The best effect was achieved with an orange-brown crayon on vintage carbon paper that is a light smooth taupe colour, it had a gsm of approximately 100. I also experimented with stitching onto the paper with a sewing machine as an alternative to overlaying the crayon rubbing with the printed organza. I did however use the printed organza for the final artwork.
Method for Applique Stitching with a Sewing machine.
To stitch into paper with a sewing machine, lower the feeddogs, insert an applique presser foot, check tension and commence sewing slowly on an experimental piece of paper to gain insight into how to achieve the result you are after.
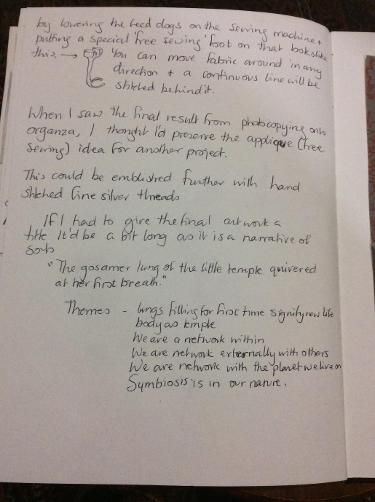
The Resolved Artwork.
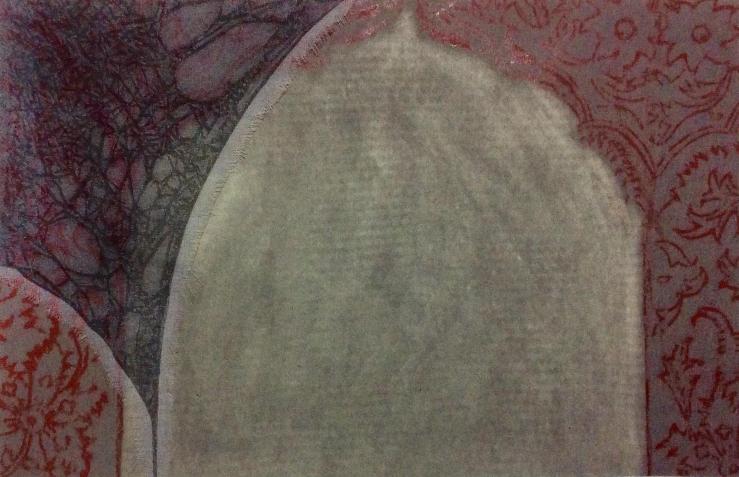
‘The Gossamer Lungs of the Little Temple Quiver at Her First Breath’. Ingrid Schmidt. 2019.
Crayon on vintage carbon paper, erasure, laser photocopy on silk organza.
Where To From Here?
These images could be embellished with gold and silver thread, paint or pens…
© Copyright Ingrid Schmidt